Wednesday, December 29, 2010

Engine problems and solutions

Well, nothing much has happened in the "restore" mode of the car.  I wanted to have the motor completed before the end of Christmas break, but there have been some major setbacks.
I finished the heads and started seating the new valves when I noticed one of the valves was very loose in the seat.  (This is the valve that had the broken spring back sometime in the early 90's.) The valve seats way too low in the head.  There is a half-inch play in the valve as well. 
My choices were to replace the head, put in new valve sleeves and hope they fix the problem, use oversized valves, or just send the heads out and have them completely redone.  I decided on none of the above.  After researching the block a little further, I found out it is actually a 1967 428ci Cobra Jet block.  This led me to hunt for a new motor as a basic build.


Luckily, I was able to acquire a new 390 today.  I have not picked it up yet, but I have purchased it and secured it.  The only information on the history if it is that it is from a 1969 car and has a 2bl carb.  The engine comes complete with carb, automatic tranny, starter, alternator, and original stock powered by ford chrome covers still attached.  ($200 for everything)  I was unable to get any block numbers, but the block does have lower ribs, which indicates it was probably a 427 interceptor base block.  I will not know much more until I get it home and start the process of taking it apart. 
Since I already have all of the parts to rebuild my 390, this should be an easy rebuild.  I will be using my original intake manifold in place of the 2bl intake.

Friday, December 10, 2010

Slow going

I have done very little in the past week or so other than a little cleaning and purchasing.  I did finally identify all of my engine parts.  My block is actually a 428ci Cobra Jet.  This gives me a lot of choices if I want to beef up the horsepower.
I have finished one of the heads.  I will be working on the second head this weekend in hopes of getting them back together very soon and shelved. 

Cleaned and Finished

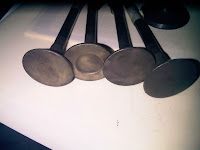
This week I did get new lifters, a new cam, and new valves.  On top of having different lifters in the car, a few of them are stuck.  It has been nice sitting at my desk working on paperwork while taking apart each lifter just to see if they were all good.
I probably will not tackle replacing the cam, since it is not pitted or lobed.  I purchased the cam and lifters together for the bargain price on eBay of $36.00.  It never hurts to have extra parts to trade.


after cleaning and painting

after cleaning and painting

after


before

before cleaning and painting

Wednesday, December 1, 2010

Trouble brewing


So, I have decided to make the engine my first priority this month.  I was hoping to have an easy time cleaning and re-assembling.  The more I cleaned, the more trouble I found.  The first problem was the heads.  They are not from the same engine.  The numbers show they are from a 1972.  That is not a major problem, as the 72 heads are actually better than the heads from a 60’s model.  I remembered that back in the late 80’s, I broke a valve spring and replaced it.  Upon further inspection, the new valve spring was a little different.  It was actually from a high performance 390.  No problem, I would take it off and put back on an original.  While I was at it, might as well put on all new springs and clean the valves.  After removing the springs and valves, it did not take much cleaning to realize that the valves were different.  I have only removed the right side, but all of the exhaust valves are different.  They are different manufacturers, different lengths, and different bases.  I had the lifters in cleaning solution and was checking them to make sure that the hydraulic lifters operate correctly, when I made the discovery that 4 of the 16 are actually shorter!  So now, I have to replace the valves, push rods, and lifters.  Unfortunately, I am not quite sure what year to search for the parts.  The local parts place list different valves, springs, lifters, and push rods for different years.  I have put information on the ford forum, but the only response I have received are from hard-core 390 rebuilders who recommend the heads be totally reworked to use high performance parts.  I hope that I have a response soon.  Until then, the cleaning continues.
*I have an answer for the heads.  They are from a 1975 F100.  The parts and numbers match.  This came from another forum.  The heads are 360's, but that is standard for the 390's.  I have found all of the parts and this problem should be solved. 

Wednesday, November 24, 2010

Motor work

With the onset of cold and nasty weather, I have decided to spend the first part of the winter with the motor.  I have cleaned the workbench off and started the process of rebuilding the motor.  Everything looks good so far and with a little hard work, I plan on re-assembly soon.
I have identified the 390 the car currently has.  It was manufactured on August 31, 1967. 
The oil pan was filled with sludge, as I expected from the years of sitting.  What I did not expect was the sludge under the oil baffle on the intake manifold.  I originally was not going to take off the baffle, but after reading in the forums, it sounded like a good idea.  I will have to drill and tap the attachment rivets, but it was well worth getting under the baffle to see the mess.
I have a few options for gaskets and rebuild kits, but I think I may have new old stock kits from eBay soon. All of the lifters looked clean with no wear. 
 
I did start to catalog and clean the emblem's around the vehicle.  Looks like most of it will have to be saved due to the price.  Most of the outer emblem chrome is only slightly pitted.


Saturday, November 20, 2010

I just need more free time!


2nd attempt after wet sanding

I have not made any major progress over the past two weeks.  Today was supposed to be a day of working with the intake manifold, but I ran out of free time quickly.  I did start restoring a few parts such as the front turn signals.  One of the gaskets had leaked on the right housing and it was completely filled with rust.  I am using Rust-Oleum rust converter on the small rust and it did a good job.  It goes on milky and turns into a black epoxy when dry.  I used a good primer over that and added the reflective paint.  It actually came out good.  I think I will sand and do one of them again. As you can see from the picture, the reflective paint shows anything not completely smooth.  I think a second coat of primer and some light sand paper will make it look new.
I cleaned the exhaust manifolds, which always leaked on the right side.  They are shot.  There is a lot of pitting around the gasket area and there is not much left to be milled.  I had forgotten that one of the bolts broke off many years ago and it was drilled out.  The bolt is not threaded correctly. 


Tuesday, November 16, 2010

Not much progress

Not much progress over the past two weeks.  I have been picking up items a little at a time when they go cheap on eBay.  The frame is ready for sanding/sandblasting and the parts are all ready to be cleaned and painted.  This weekend I will be cleaning and finishing the intake manifold. 
I have picked up an engine gasket kit and as soon as I get time and the garage cleaned again, I will be ready to start on the engine as my November project.

Saturday, November 6, 2010

New Carb Restored


Before

The new carb has been rebuilt and restored.  It will be shelved until the motor is complete.  I was shocked when I finished and did not have any screws left over.  There is a first time for everything!
After


Before

After


After

Before
After

Tuesday, November 2, 2010

New carb is here!

No real progress this week, but the new carb has arrived.  It is not new, but it is new for the car.  I have opted to replace the Ford Carburetor Autolite 4100 C5AF-AA with a Holley 4160.  This is in line with what was available for original purchase and constitutes an upgrade in performance.  The 4160, although a workhorse, will be shelved for possible future use or sale. 

The Holley does have some positives as well as negatives.  The ease of adjustment and performance should offset any negatives.  Although this carb looks like it is ready to go, I will be rebuilding and restoring it over the next few days to new condition.  Even though it is a little 80's, I will be painting the carb with Eastwood carb paint.   Why not restore the carb to the original luster while rebuilding it?

Sunday, October 31, 2010

Slow Grind

Frame is completely seperated and ready to be cleaned/sanded/scraped/sandblasted and painted.  The only items left on are the rear control arms.  I will have to take out the bushings for removal and this will require a modified tool.  I have experimented on several areas and it should go smooth.  I have cleaned the intake manifold and other misc parts.
The orignal carb is shot.  I might rebuild it later for re-sale, but I have purchased a Holley 4160 for replacement.  The 427 offered the same carb originally, but this one has some upgrades.
There will not be much to report as the frame is the priority.

Tuesday, October 19, 2010

Motor out and I can see light at the end of the tunnel.

The motor is on a stand and the only thing left before the end of the process is to disassemble the frame.  This should only take a full day of cursing, hammering, and grinding.  After that, it is time to start rebuilding. 
I have tested a few places on the frame, and I am confident it will not need any major repair.  The main concern is finding the best way to clean and protect the inside of the tube frame.  I have several great suggestions from the pro’s.
The white stuff on the motor is drywall, from the first idea I had of using the garage beams as support for the hoist.  I had to cut into the drywall to get to the joist, and decided this would not be a good idea.


Saturday, October 16, 2010

Acorns everywhere!

I moved the frame outside and removed the transmission.  I sprayed the frame off for an initial cleaning and decided to run the hose down the access port in one side of the tube frame.  The front hole produced acorns for over 45 minutes.   The right side was just as bad.  I probably had 30 pounds of acorns in the frame!
After cleaning, I was able to get a better look at the rust and what needs to be done.  The rear cross bar is the only part of the frame I may have to replace.  It is rusted, but not through.  Although it is surface rust, it is pitted pretty bad.  Once I sandblast, it will be easier to tell if it is salvageable.  I hit it with a hammer and it sounded solid, did not dent or crack.  Inside looked good, with no rust flakes anywhere. 


The transmission came out with no problems.  It worked well prior to sitting and still shifts fine.  Just to make sure, it is going to a transmission shop for rebuild.  That is one item I am not prepared to take on myself.  Nothing brings out neighbors like an old car frame in the driveway!