Tuesday, October 30, 2012

Step by Step

Cleaned
Painted
I have gotten more done that I thought I would so far this week. Two hours per night has made a difference!
I was able to get the front engine housing completed and the oil filter housing finished as well.  Tonight I made good use of the gasket set I purchased 5 years ago...back when I was just thinking of doing a restoration. So far, every gasket I needed has been in the kit. I was talking to my wife tonight and I think I purchased the complete gasket set for around 30 bucks!
 
Cleaned
Painted
I put on the front engine housing, oil filter housing, harmonic dampener, oil pump, and oil pan.  The bottom of the engine is now complete! I turned the engine over on the stand and thought that while I was looking at the top of the motor, I would install the new lifters. I guess I will be working on the top half of the motor for the next week or so.
 
The exhaust manifolds are not as bad as I originally thought.  After consulting some of my fellow restoration blogger, there may be a lot of life in them.  I will, however, have to get them milled before I make my decision.
 
Right Side Up!
On another note, I was able to purchase arm rests on eBay for $10.00! They should be here in the next few days.


New Lifters!


Thursday, October 25, 2012

Ready for winter work

Oil Pan Before
Oil Pan After
 
 I have been getting ready for the winter projects and ready for spring with some small projects.  My goal is to have the engine ready to put on the frame by spring and finish all of the small work in preparation.

I was able to finish a few things this week.  The front radiator housing is cleaned and primed. I still have to go over it again and make sure it is completely ready for painting. I did lay the housing on the frame in preparation for making some of the plastic housing that is long gone.  I have partial diagrams but it is going to take some measuring and cutting. 

I have done a little exam of the radiator and it is totally shot. It will be more expensive to rebuild than it would be to purchase new.  All brass....so maybe some cash for scrap.  I also have partial wiring harnesses ready for rebuild. My plan is to replace all wiring with new. 


Sunday, October 14, 2012

Working through the winter

Before
 
This was a fairly slow week but I was able to get a few things completed. The cross bar is cleaned and ready to be installed.  I was able to salvage the parking brake cable.  It was in great shape and I don't remember the emergency brake every working so it was practically new...although dirty. I will install the cross member this week in preparation for the drive shaft.


During

I did get 1 upper control arm installed. The control arm bushings were a wonderful treat! I did not think I would ever get them pressed in but after much swearing, sweat, and walking away, they went on very easy later in the day. 


After
I have the steering gear half way apart.  It was way out of adjustment and I am unsure if it can be salvaged. Looks like a rebuilt one is only $70 or less and that may be the way to go. I won't know the condition until I get the Pittman arm off...and that thing is not moving.  I broke a nice removal tool and it has not moved at all!  Looks like it will either get the torch or the grinder soon.


Sunday, September 30, 2012

Slowly moving forward

This week has been a clean, scrape, blast, and paint week.  It is nice to have a rolling frame to get in and out to work on.
I have managed to locate the trackbar bushings as well as the upper rear control arm bushing. Moog K8136 and Moog k8447. I have been told that these will fit with very little modification. I will post the specifications and outcome once they arrive.
I have cleaned and painted the drive shaft. The front control arms are finished and ready for the shelf until bushings arrive. I also have finished a few odds and ends from the front end.

Unfinished Crossbar
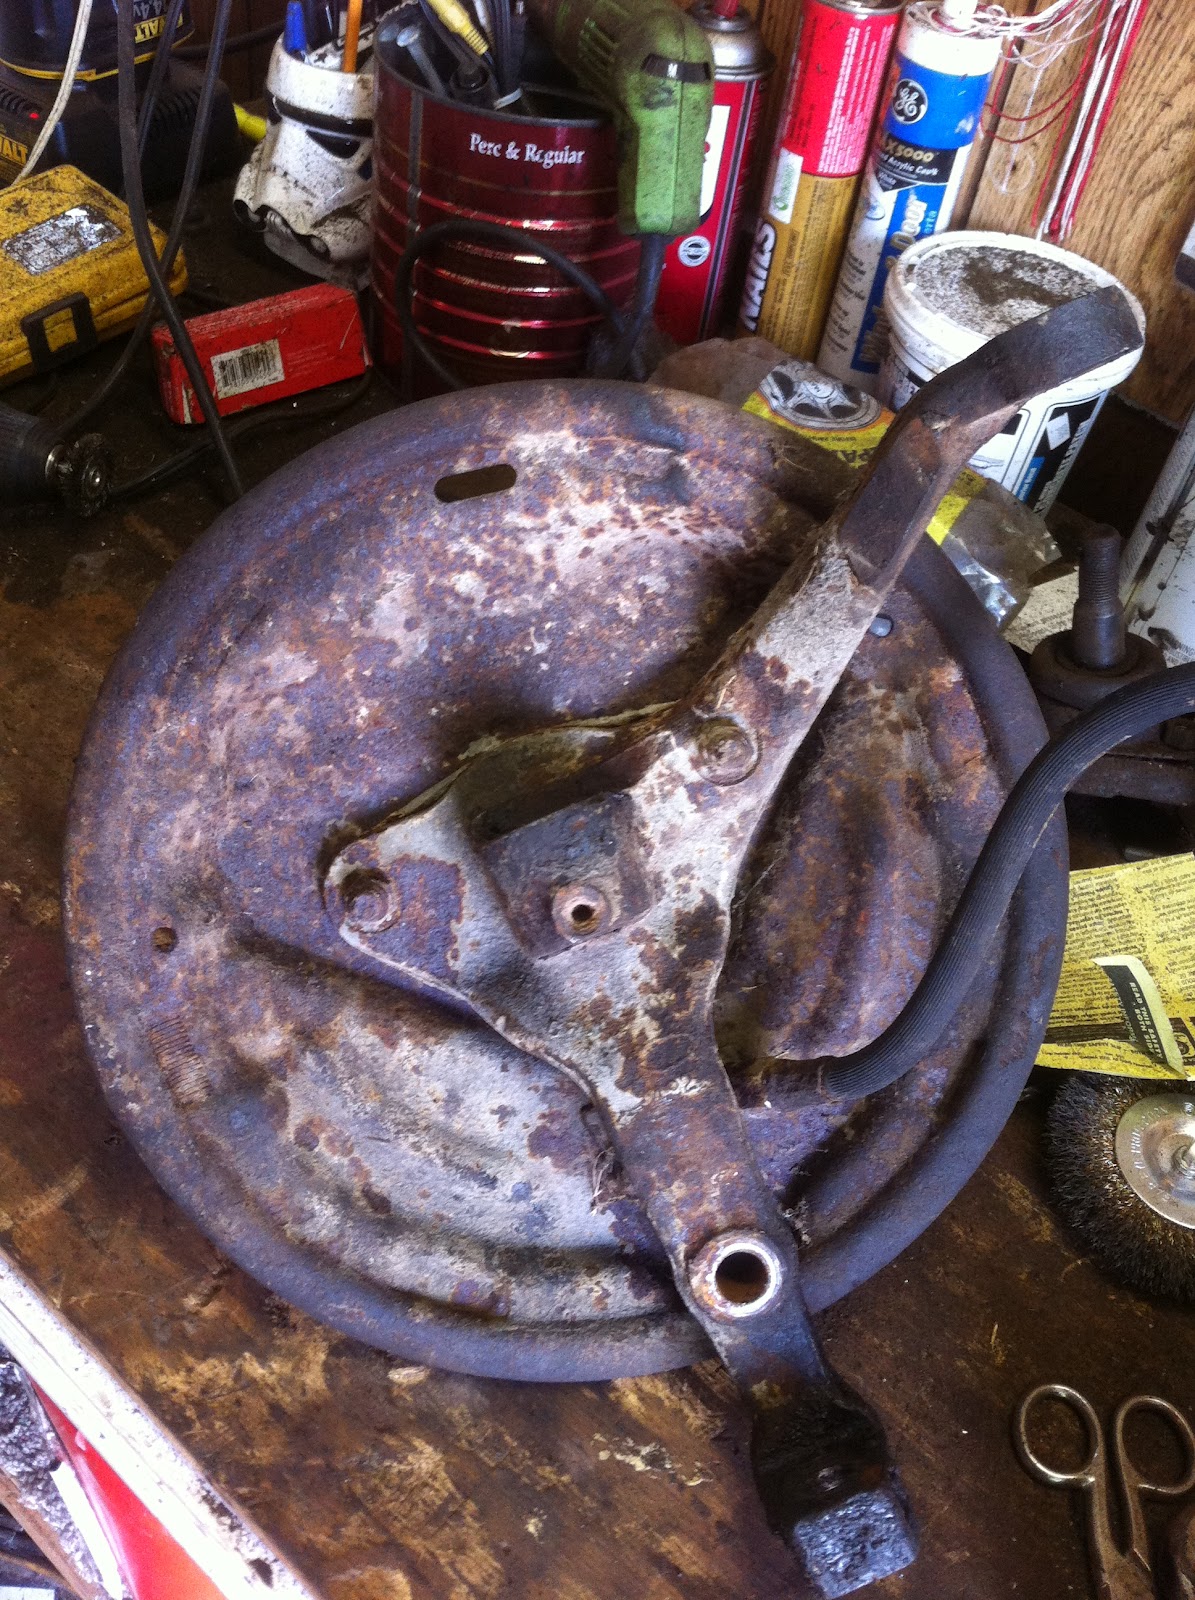
Digging through the barn, I have found a front break drum and rear break drum. I will be restoring those later on in the week as extras or to be sold. I also have acquired a 2bbl carb I will be rebuilding and selling for parts money. This came off of the 390 I purchased a few years ago and I forgot it was on a shelf.
This week will be a slow week and I do not expect to get much finished. It will be mostly a cleaning and preparing week. I will decide this week if I am going to use the C6 transmission or the Cruse - o - Matic. Although I know the C6 will be more reliable, I am not sure I can find a new cross member to fit the C6.


Unfinished
Unfinished Drive Shaft


Finished Control Arm - Lower


2BBL Carb to rebuild


Finished Upper and Lower Control Arms


Finished Drive Shaft

Finished Drive Shaft


Almost finished Crossbar


Wednesday, September 19, 2012

Simple Black

 Doing little by little each night pays off. All of the motor is complete but the intake and heads are not bolted down yet. I took some time to finish off the intake this week. That was the last part to complete before starting the process of getting the motor completely assembled. I still need to paint the motor, but I think it will be easier to bolt on the intake and heads before finishing the paint.
I did spend a lot of time getting the break drums cleaned and painted. Even though I will be putting disc brakes on the front, I will probably assemble the front to make a rolling frame.
There is a slight update on the rear control arm bushings. I was able to get OEM bushings from a local store very cheap. I know I wanted to use poly bushings but some of my fellow restorers have warned against using them on old control arms. I actually got the OEM cheaper than the poly bushings.
The next step will be pressing in the bushings and then trying to find the dreaded rear upper bushings. I have a couple of leads and hopefully it will pan out.
I was looking for the tracking bar bushings today and I had to laugh at O'Reilly Auto Parts. They were the only place that have the bushings available and they wanted $187.99 each!! Honestly, one of the bushings fell out back in 1988 and it was replaced with a rubber garden hose that worked fine for 10 years. I will not go to that extreme. Adjustable tracking bars are available fairly cheap with the bushings included and there are several other options.  Even OReilly shows on their web page that these are the same bushings used on 532 different cars dating up to 1973.  A quick search for the 1973 LTD bushings yielded a pair from J.C. Whitney for 19.98.

Saturday, September 15, 2012

Moving along

I was able to get the front control arms cleaned and primed this week. Once the bushings arrive, I will be able to attach the rear to the frame. I also worked on the front suspension. Thanks to the tips from Ford Muscle Forums for removal of the front ball joints and bushings.
Most of the day today was removing the original ball joints on the front.  The uppers were riveted on and I ended up breaking 4 drill bits trying to get them out. I ended up going the messy rout by using my grinder to grind down the rivets. It took a lot of elbow grease but they came off.
I also had a wonderful time getting the front bushings out. After much drilling they eventually came out.
The rear bushings are from a 1999 Camaro. Surprisingly, they fit like a charm. The only modification is to drill out the inner ring to accommodate the bolt.


 Although I am going to go with disc brakes on the front, I have decided to clean the front spindles and rebuild them for sale (or possible swap). 


Tuesday, September 11, 2012

Rear = Done

The rear is cleaned, adjusted, painted, and assembled.  I used my old rims and tires to make it easier to store in the garage until I am ready for them.  I have the upper and lower control arms completed.  As soon as the bushings arrive, I can start assembly for the rear to be attached.  I will leave everything loose until I have it all completed.  If it all goes according to plan, I should have the rear attached early next week.

I am concerned with play in the rear. It is well within tolerance and I have not added fluid yet. It may be that the rear was too tight before or I just didn't notice the play when taking it apart.  There was so much solidified fluid that it probably cushioned any noises.


I am slowly starting to prepare the front control arms for sand blasting. The nooks are difficult to reach and will need cleaning before the priming.